Below I will be sharing some of my setup steps as I work to test changes on the “v2.0” CEP.
Hugo Site Setup
First, I created a blank repository and used the hugo new site command to create a barebones structure. I’m using the latest version of Hugo, and I’m following the latest version’s directory structure as to avoid any deprecated features.
Here is what my directory structure is, and notes about the directory structure and its contents:
/content/_index.md
/content/wiki/_index.md
/layouts/baseof.html
/layouts/list.html
/layouts/single.html
/layouts/_partials/display-citations.html
/layouts/_partials/generate-site-csv.html
/layouts/_partials/generate-site-json.html
/layouts/_shortcodes/cite.html
/layouts/_shortcodes/wiki-link.html
/static/style.css
/static/photos/
/static/sveltia/index.html
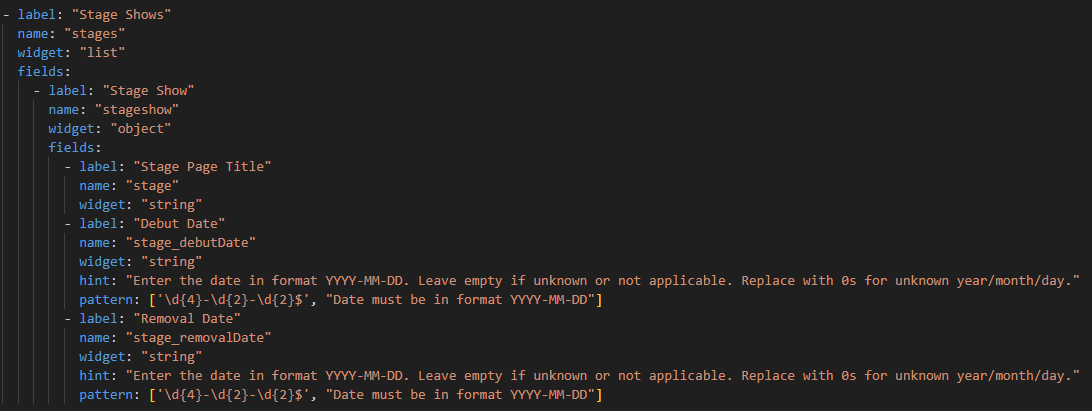
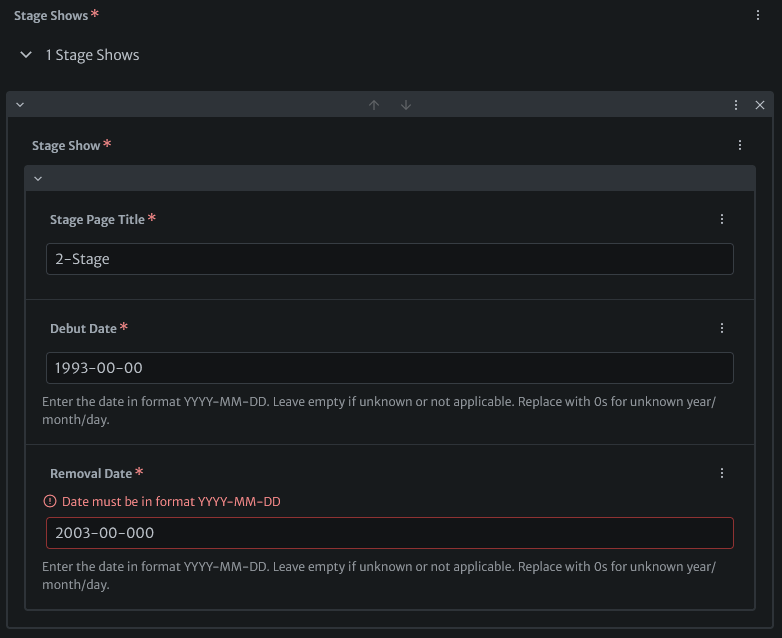
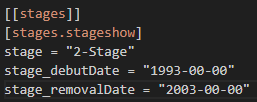
/static/sveltia/config.yml
The content folder is solely meant to store articles – I have simplified this down to just wiki articles for now and will expand each section as I make it compliant with the new site development standard.
The layouts folder is meant to hold all template information – based on my research, a separate theme directory is not required, neither is a separate default folder, and I have only created the bare minimum to get a site going – baseof.html is the core page template including HTML declarations, headings, stylesheets, etc. and is used to call the generate CSV/JSON partials (simply embedded HTML), while list.html dictates the page format for lists (the _index.md pages) and single.html dictates the page format for individual articles.
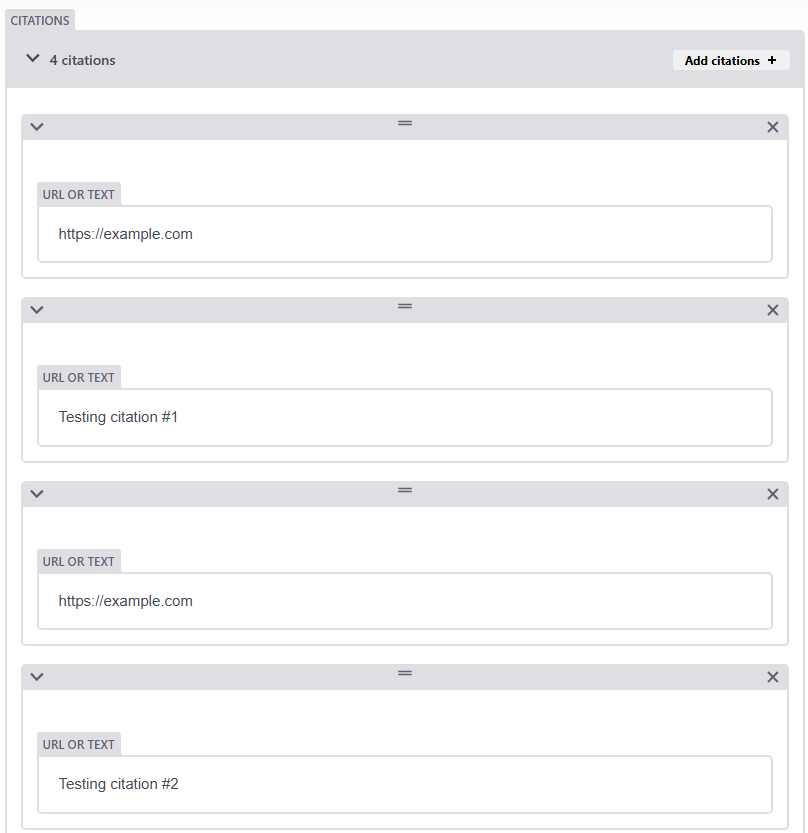
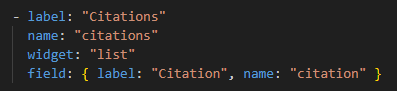
In the layouts/partials folder, I created HTML templates to output citations on pages and generate CSV and JSON for the entire site. In the layouts/shortcodes folder, I created shortcodes to make page editing easier based on currently existing codes on the site (in fact, I used this testing site to roll out those changes on the main site, so that is why they are there).
My goal is to reduce the number of templates needed to achieve the same result so that our build time goes down (it is currently around 7-8 minutes), so changes reach the main website more quickly.
Lastly, the static folders contain a spot for photos to go to (from SveltiaCMS), and then the SveltiaCMS access folder which includes a single HTML page and a configuration file. More on that in the next post.
As of writing this, I wonder if the generate CSV/JSON partials should be moved, else they’ll run on every page.
DigitalOcean Setup
DigitalOcean provides free hosting for static sites hosted in GitHub repositories. To begin, I created a free team on DigitalOcean (I linked my GitHub account with it for signing in), and then within the team implemented a free app through the “App Platform” it provides.
When I created the app, it asked me for a deployment source. In this case, I selected the GitHub repository where the Hugo site was being stored. To match CEP’s configuration, I selected the main branch and ensured that auto deploy was enabled.
Before creating the app, I was shown what looks like a checkout screen. There I saw all of the settings – DigitalOcean recognized that it was a Hugo build and set up the defaults accordingly. I did not change any defaults so that it is using the latest version.
The app was ready, and I was immediately given a URL. I could’ve stopped there but I had custom domain, so I went through the trouble of setting that up by going to the settings and adding another domain.
SveltiaCMS/Cloudflare Setup
This section is less about the setup in Hugo, more about setting it up so I can connect it to GitHub with authentication so I can use SveltiaCMS in the browser just like we would use DecapCMS on the current CEP site.
I had to go to this repository: https://github.com/sveltia/sveltia-cms-auth and follow the steps it provides. I had to create a Cloudflare account. Having the personal domain helped with setting up the OAuth app in GitHub.
Once that was setup I was good to continue, which brings us to sometime in August.
In my next post, I’m going to outline some of the preliminary changes I’ve already made with SveltiaCMS as our primary editor and what I’ve found useful to make the site easier to work with in the future.